Guide
TrueNAS Deployment
TrueNAS Role
TrueNAS provides centralized storage for self-hosted services including Immich and Nextcloud, allowing the homelab to replace cloud storage providers such as Google Photos and Google Drive. Storage is implemented using mirrored ZFS pools for redundancy and data protection.
What This Solves?
- Self-hosted photo storage with Immich
- Self-hosted file storage with Nextcloud
- Removal of Google’s 15GB storage limit
- Local data ownership and privacy
- Disk redundancy using mirrored ZFS pools
- Backup replication to external drives
Skills Acquired
Overview
TrueNAS SCALE Community Edition is an open-source network attached storage (NAS) platform designed for reliable data storage, redundancy, and self-hosted services.
In this homelab environment, TrueNAS provides centralized storage for self-hosted applications and implements mirrored disk redundancy to protect critical data.
Official site:
https://www.truenas.com/Purpose
The TrueNAS VM was deployed to solve several problems within the homelab environment:
- Self-hosted storage for Immich (replacement for Google Photos)
- Self-hosted storage for Nextcloud (replacement for Google Drive)
- Eliminate the 15GB Google storage limitation
- Provide local data ownership and privacy
- Implement disk redundancy using mirrored drives for data protection
- Maintain a separate backup pool for replication and disaster recovery
Primary storage is hosted on mirrored Samsung 860 EVO 4TB SSDs, with external Samsung 860 EVO 2TB SSDs drives used for backup replication.
Services Running on TrueNAS
TrueNAS SCALE includes an apps marketplace, which exposes a large catalog of containerized services and Docker images that can be deployed directly from the web UI. You can browse available applications in the TrueNAS Apps Catalog.
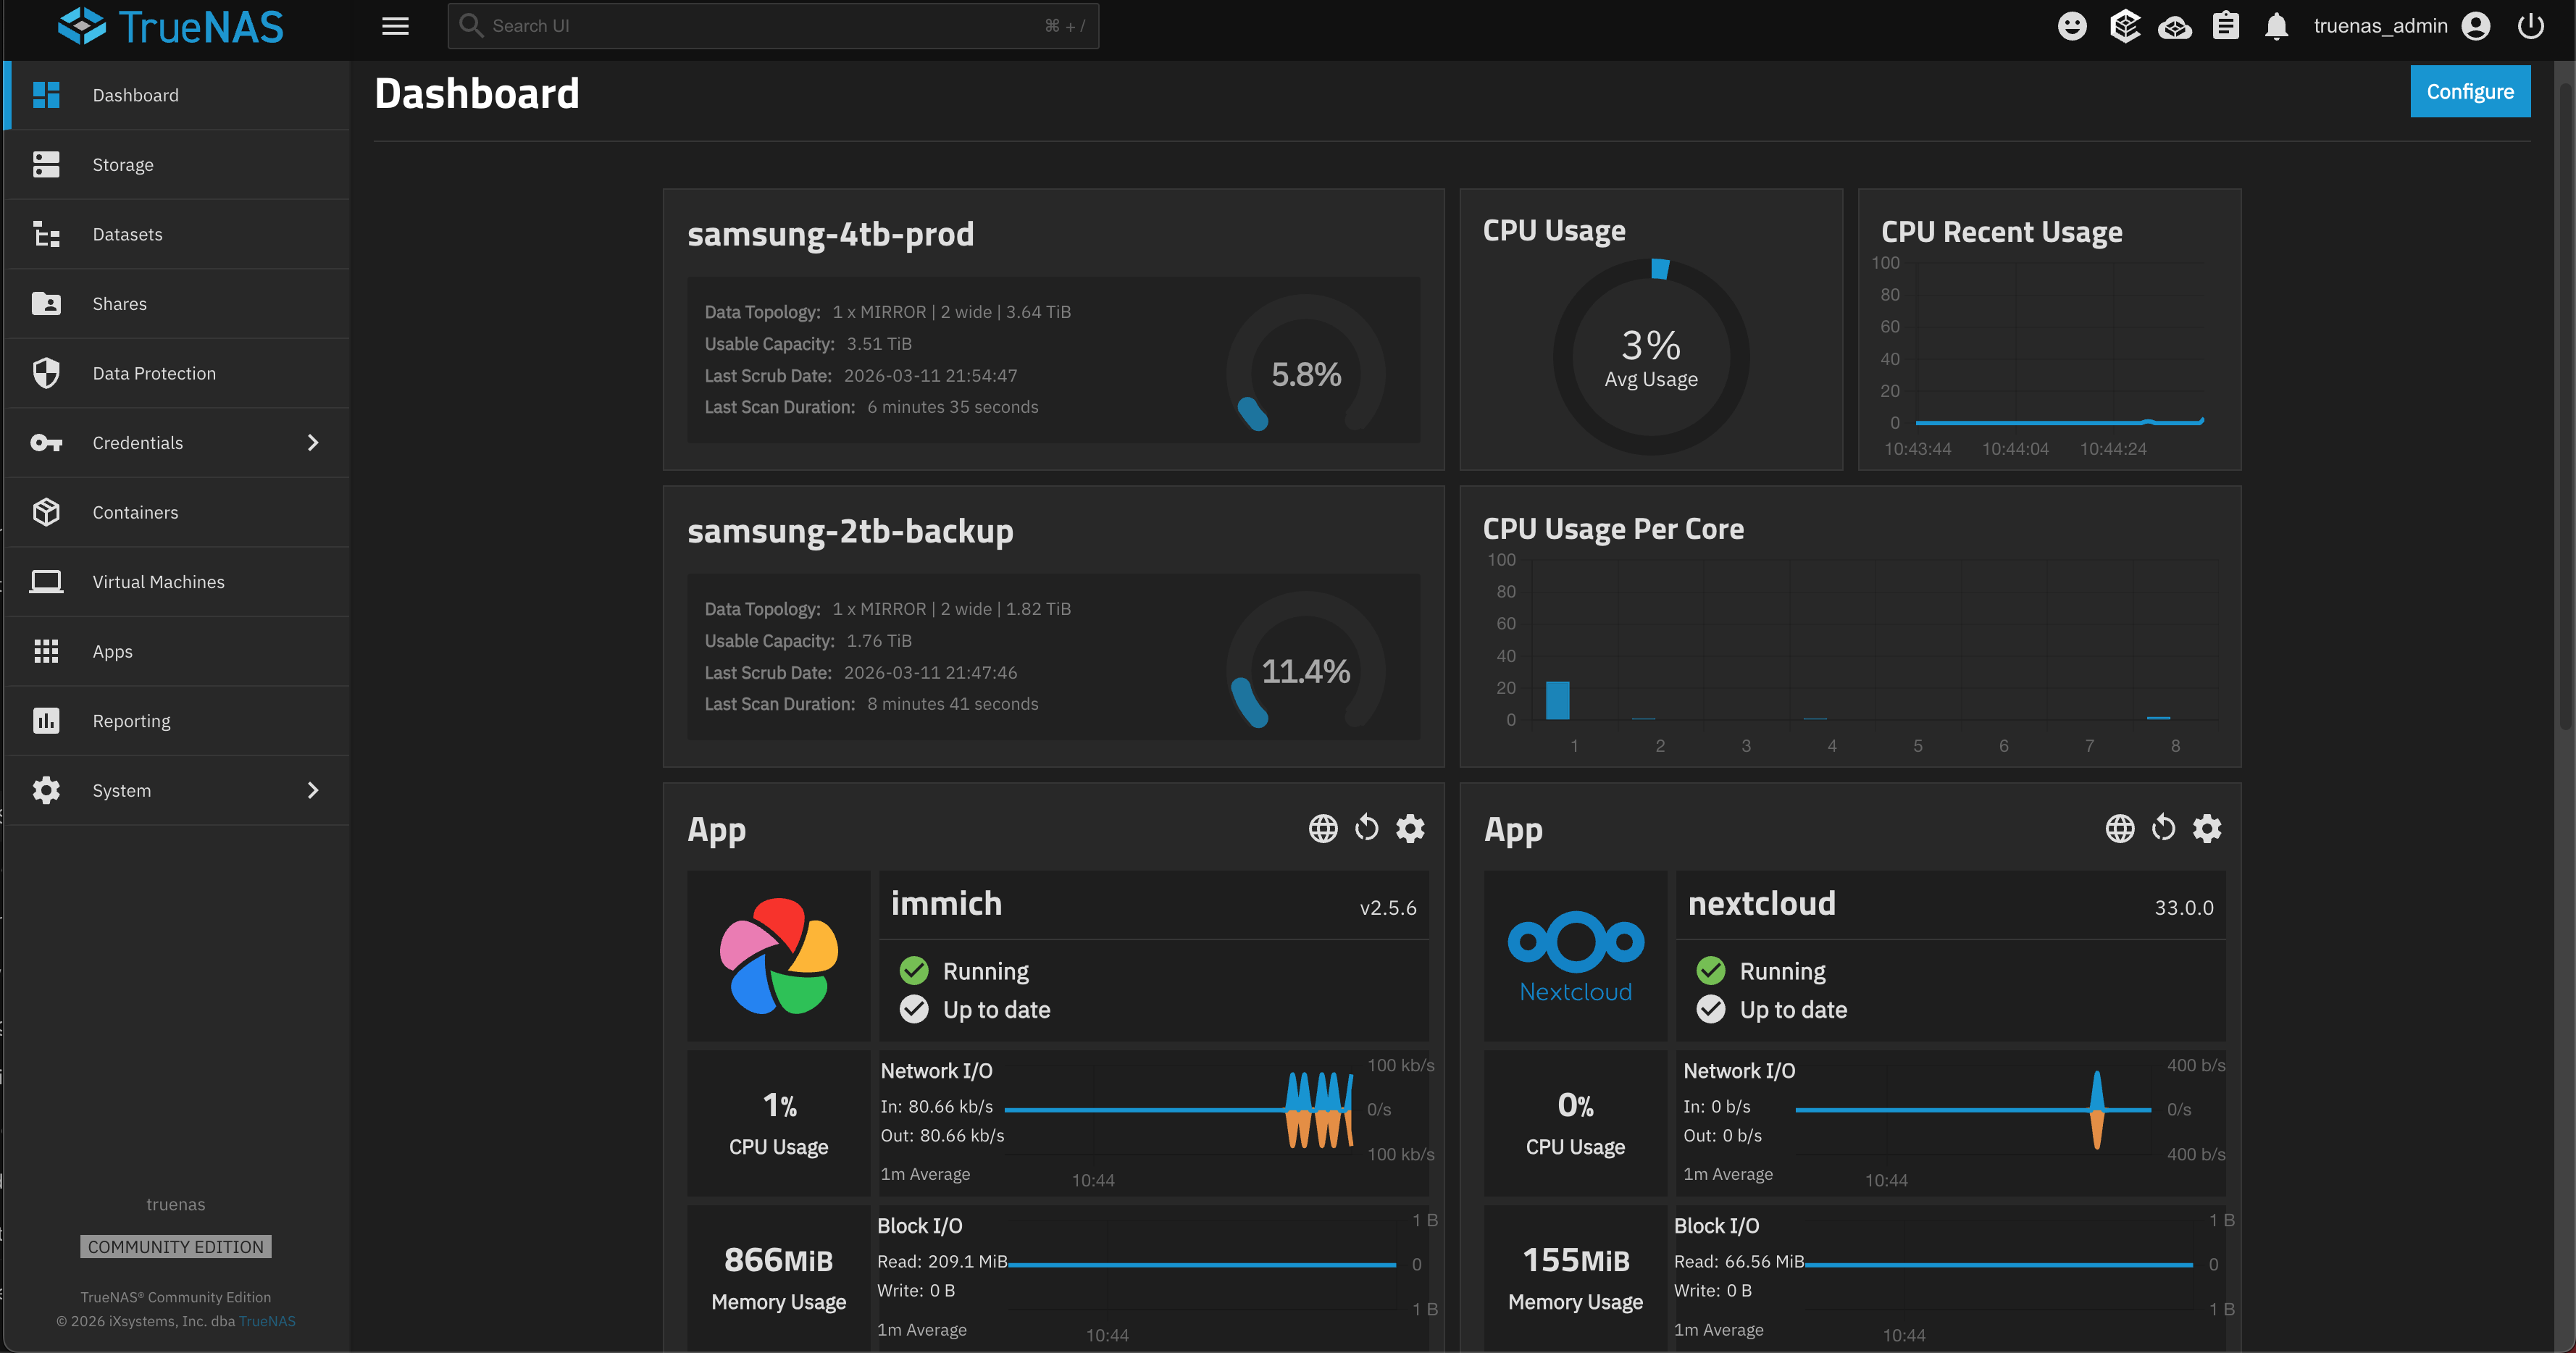
In this homelab, TrueNAS currently runs Immich for self-hosted photo storage, Nextcloud for file synchronization and collaboration, and Tailscale for secure remote access to the environment.
Infrastructure Context
This TrueNAS instance runs as VM 104 on the Proxmox hypervisor, with ZFS storage pools created on physical SSDs passed directly to the VM using disk passthrough. The platform provides centralized storage for services running in the environment and as backup for the homelab infrastructure in case of a disaster recovery scenario or data loss event.
Steps
Step 1 — Install TrueNAS SCALE VM
Download the TrueNAS SCALE ISO
https://www.truenas.com/- Create a new VM in Proxmox.
- Assign the Samsung NVMe drive as the VM system disk.
- The VM OS runs from this disk while the storage pool will be created on separate drives.
- Complete the TrueNAS installation through the web installer.
Step 2 — Enable Physical Disk Passthrough
Because TrueNAS manages disks using ZFS, the disks must be passed directly to the VM instead of using virtual disks.
Enable PCIe passthrough in BIOS before continuing.
After enabling this setting, reboot the Proxmox host.
Step 3 — Identify Physical Disks in Proxmox
Access the Proxmox shell.
lshw -class disk -class storage
Then run:
lsblk |awk 'NR==1{print $0" DEVICE-ID(S)"}NR>1{dev=$1;printf $0" ";system("find /dev/disk/by-id -lname \"*"dev"\" -printf \" %p\"");print "";}' | grep -v -E 'part|lvm'
Locate the ATA identifiers for the disks you want to pass through.
Example:
ata-Samsung_SSD_860_EVO_2TB_S597NJ0NB20495W
These identifiers will be used when attaching disks to the VM.
Step 4 — Shut Down the TrueNAS VM
Before modifying disks, ensure the VM is powered off.
In Proxmox:
VM 104 → Shutdown
Never modify passthrough disks while the VM is running.
Step 5 — Attach Physical Disks to the VM
Verify existing disks in:
VM 104 → Hardware
Identify the next available SCSI slot.
Add the disk using the Proxmox CLI:
qm set 104 -scsi3 /dev/disk/by-id/ata-XXXXXXXXXXXX
Replace the identifier with the correct disk.
Repeat for additional drives.
Step 6 — Add Disk Serial Numbers
Edit the VM configuration file:
nano /etc/pve/qemu-server/104.conf
Append serial numbers to each disk entry.
Example:
scsi3: /dev/disk/by-id/ata-...,serial=XXXXXXX
scsi4: /dev/disk/by-id/ata-...,serial=YYYYYYY
Save the file:
Ctrl + X
Y
Enter
Optional — Allow External Backup Drives
For removable backup drives, add the optional parameter.
Example:
scsi5: /dev/disk/by-id/ata-...,serial=ZZZZZZ,optional=1
This prevents the VM from failing to start if the disk is not connected.
Step 7:
Start TrueNAS and create the storage pools.
In my case I created 2 mirrored sets. One for production and one for backups.
(I added the image of the storage pools in /images/truenas-storage
Step 8: Create Replication Task
In TrueNAS:
Data Protection → Replication Tasks → Add
Configuration:
| Field | Value |
|---|---|
| Source | Samsung-4tb-backup |
| Destination | Samsung-2tb-backup |
| Recursive | Enabled |
| Task Name | Samsung4tb-backup-to-Samsung2tb |
| Schedule | Run Once |
| Retention | Never Delete |
Save the task.
Step 11 — Run Replication
Start the replication task and wait for completion.
Confirm:
- • Task status shows Success
- • Dataset sizes are similar
- • No ZFS errors
Completion Criteria
The configuration is considered successful when:
- • Replication completes without errors
- • Production and backup datasets match in size
- • ZFS pools report healthy status
- • Backup drives can be safely removed
Operational Notes
Always follow these rules when working with passthrough disks:
- • Always shut down the TrueNAS VM before modifying disks
- • Never hot-remove passthrough disks while the VM is running
- • Always verify disk serial numbers before attaching disks
- • Removing the wrong disk can corrupt ZFS pools